Are you looking for a contractor?
Submit our quick form and get quotes now!
Table of Contents
6 min read
How to Install a Heat Recovery Ventilator

6 min read
How to Install a Heat Recovery Ventilator
Interior renovationsHow to Install a Heat Recovery Ventilator
Are you thinking about purchasing an air exchanger to improve the comfort level in your home? If you want to get the most out of this device, installation is key.
Keep reading to know more about the installation process of an air exchanger.
Installing a Heat Recovery Ventilator
In need of an air exchanger?
First of all, the ideal humidity level inside a house should be between 40 and 45%. Some people consider installing an air exchanger as soon as they notice condensation on the inside of their windows. However, it is important to maintain an appropriate level of humidity inside a home to avoid health problems related to a lack of humidity, such as dry skin or itchy eyes.
Should this be the case, it is highly recommended that you do not install an air exchanger, even if you note the presence of condensation. Installing an air exchanger would reduce the humidity level too much, which could lead to health problems such as dry skin and shortness of breath. Therefore, if the humidity level is adequate and you are experiencing condensation problems, a professional should be consulted to find out how best to fix the problem.
However, if your humidity level is constantly above 45 degrees Celsius and traces of condensation appear on your walls, then installing a heat recovery ventilator could be a lifesaver. This device will be able to lower the ambient humidity level, which is definitely the main cause of your condensation problem.
Why choose a heat recovery ventilator?
Although you may have heard of energy-saving air exchangers, note that this type of air exchanger is not recommended for cold climates. In fact, they should not be installed in homes located in countries where temperatures drop below -4 degrees Celsius. In climates such as ours, the HRV is more durable and resistant.
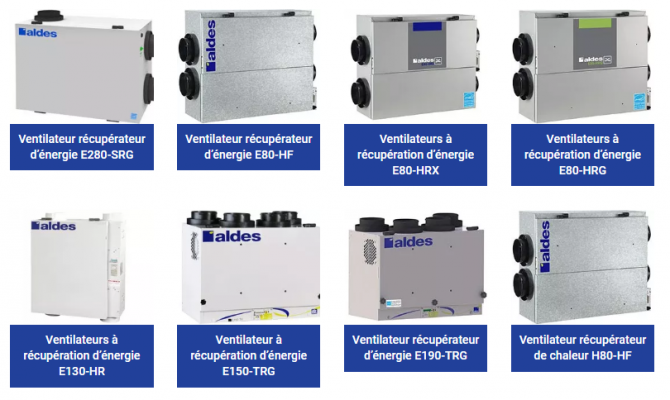
Photo: Aldes
Installing an Air Exchanger
Where best to install an HRV?
The first thing to remember is that an air exchanger should be installed in an easily accessible space to facilitate cleaning, filter replacements, and any necessary repairs. Moreover, the location has to be heated to prevent frost damage to the unit. Since garages often store contaminants, an HRV should never be installed in such a location. Therefore, installing an HRV in a garage is not recommended, as it will spread airborne contaminant particles in the house.
Aside from this restriction, ensure that the HRV is not installed anywhere near a high-traffic room or bedroom to ensure complete peace of mind. Instead, opt for the basement, which is the ideal space for this type of unit. Make sure to hang the unit to limit the vibrations and noises it might emit.
Be aware of the vent and air intake location
When installing your HRV, make sure that there is at least 72 inches of clearance between the exhaust duct and the air intake duct, and that these ducts are at least 18 inches above ground level. Ideally, install them a little higher, as this will prevent your air exchanger from accumulating too much dirt. To prevent dust particles from accumulating inside your home, be sure to install filters in the air ducts. Neglecting to do so can result in airborne contaminants spreading in your home.
In any case, it is important to make sure that grilles are fitted on both extremities of the exhaust and waste ducts. The grilles will prevent debris and small undesired items from entering the unit.
Properly choosing the size and location of the ventilation grilles
When installing your HRV, make sure that the stale air exhaust grilles are located in humid areas and not elsewhere in the house. Fresh air distribution grilles should be located as far away as possible from thermostats. Then, carefully choose the location of the grilles, especially to avoid installing them near the entrance/exit of a room, because the air will flow directly into the hallway.
Lastly, avoid installing ventilation grilles that are too small, as the airflow generated will be insufficient. As a result, fresh air will remain at floor level and warm air will rise directly to the ceiling.
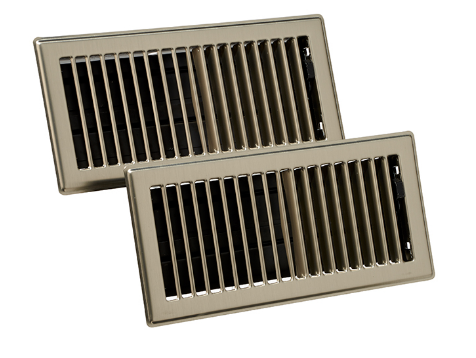
Photo: Rona
HRV Ducts
Selection process
When purchasing your HRV ducts, you can either choose a rigid or flexible model. The former is highly recommended because it allows air to circulate more freely, resulting in better energy efficiency. Also, note that rigid ducts have many more benefits than flexible ducts: They are easy to clean, will not easily squash, bend or fold, and will not need much support to remain in place.
Furthermore, flexible pipes are more likely to collect dirt, which may cause respiratory problems for residents with dust allergies or asthma. However, note that it is possible to install flexible pipes to connect your unit to the ventilation system.
If your HRV is connected to a central forced-air heating system, note that certain guidelines must be followed. According to EcoHome, the ductwork should be located at least three metres from the furnace and one metre from the return air ducts funnelling air outside.
Quick note on duct insulation
Regardless of the heat recovery ventilator model you purchase, the ductwork must be insulated to avoid condensation and mould problems. The thermal resistance should be at least 0.7 (R4).
What about water from condensation?
Condensation should always be evacuated through a floor drain. However, do not drill into the concrete slab, as this is strictly forbidden by the Construction Code given the humidity problems that may result from such action, as well as the possibility of radon fumes seeping inside.
5 Steps to Installing a Heat Recovery Ventilator
1- When determining where your HRV should be installed, choose a location that is:
Easily accessible;
Heated;
In a contaminant-free area;
Away from a high-traffic room;
In a basement or a storage room.
2- When installing the exhaust and air intake ducts, follow these guidelines:
Bear in mind that there must be at least 72 inches between the exhaust and the air intake ducts, and they should be at least 18 inches above ground level;
Install exhaust duct filters;
Ensure that the grilles are fitted on both extremities of the exhaust and waste ducts.
3- Install large enough ventilation grilles and avoid fixing them near entrances/exits.
4- When selecting your ducts, choose rigid models, as they offer more benefits:
Easily maintained;
Does not squash;
Little support is required;
Does not collect dust.
Note that the ductwork must be properly insulated; the thermal resistance should be at least 0.7 (R4).
5- Ensure that condensation is always evacuated through a floor drain.
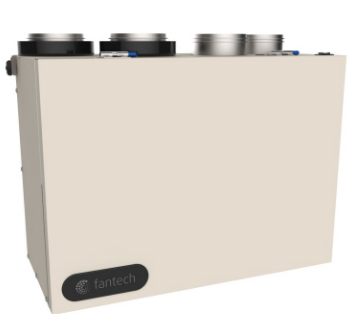
Photo: Fantech
Get 3 quotes for your heat recovery ventilator installation
RenoQuotes.com can help you get quotes for your heat recovery ventilator project. If you submit your project to us, we’ll put you in contact with top-rated contractors. Fill in the form on the homepage (it only takes a few minutes), and you will get estimates from trusted professionals.
Dial 1-844 828-1588 to speak with one of our customer service representatives.
Last modified 2023-11-07
Looking for something else?
Related articles
The latest industry news, interviews, technologies, and resources.

Amanda Harvey • 07 Nov 2023
Pressure washers are a quick and excellent way to get rid of debris that has built up over winter, as well as other dirt and grime that happens to be stuck on your outdoor surfaces. Driveways, cars, the side of your home and concrete floors can all benefit from a pressure wash, and the end results will surely leave friends and neighbours wondering how you managed to get things so clean.

Amanda Harvey • 07 Nov 2023
As we know all too well, renovating a home can be extremely costly, not to mention a stressful and time-consuming process. Not everyone is able to spend the necessary funds on projects they may want or need to carry out. Luckily, across Canada, there are several options in the realm of funding, subsidies, tax credits, and grants that can be applied to your province-specific home renovation project.

RenoQuotes.com • 08 Dec 2023
A kids’ playroom is supposed to be fun for them and low maintenance for us—a space that’s ultimately meant for playing and conducive to creativity. In some homes, having an entire room dedicated to such a purpose isn’t out of the question, or even a basement, while in other, tighter quarters, this area has to be merged within another space serving an entirely different purpose.

Cynthia Pigeon • 07 Nov 2023
The residential kitchen really has evolved through the years: it's kept up with design trends, new technologies, and the occupant’s habits. It used to be a gathering point where people spent hours cooking, cleaning, and socializing.
Léa Plourde-Archer • 07 Nov 2023
Most people dream of having a room, or even a corner of their home dedicated to relaxation and well-being. Everyone has their own idea of what relaxation means, as well as what makes them feel zen. No need to live in a mansion to have your place to get away from it all! RenoQuotes.com has a few tips on how to set up a renovation corner at home.