Are you looking for a contractor?
Submit our quick form and get quotes now!
Table of Contents
8 min read
How to Build a Concrete Countertop
8 min read
How to Build a Concrete Countertop
KitchenHow to Build a Concrete Countertop
Raw materials are all the rage when it comes to designing modern kitchens. Unlike wood, which is chosen for its essence, veining, and grain, concrete is made from a mixture that’s poured into a mould to create a heavy and uniform mass.
If at one point, concrete was difficult to mesh in a kitchen, however, over time, the material’s tweaks have led to its sought-after aesthetic.
How the Concrete Countertop Came to Be
According to Yves Perrier, a guest collaborator at La Presse (French only), concrete countertops extemporaneously appeared in Quebec kitchens in 1998, courtesy of a few artisans. However, their raw look didn’t appeal to the mass. The first countertops that were left bare resembled a gray slab and were difficult to mesh with other kitchen-related materials. Some of these artisans went as far as to travel to California to train under master craftsmen in the field.
The artisans returned with significantly improved precast concrete, both in terms of design and fine finish. The latest version of precast concrete was available in three different hues: green, blue, or dark gray, combined with a uniform finish or with a weathered aggregate look obtained by polishing the compound, and then, covering it with a clear sealant reminiscent of polished granite.
While cuts of granite slab are expensive, moulding concrete is waste-free even when taking up complex shapes, thus making it a low-priced alternative. Granite and concrete are similar in design, but designing concrete is limitless since it’s easy to add glass, ceramic, and other material inserts. Concrete is less costly and often thicker than granite by 4 to 10 cm.
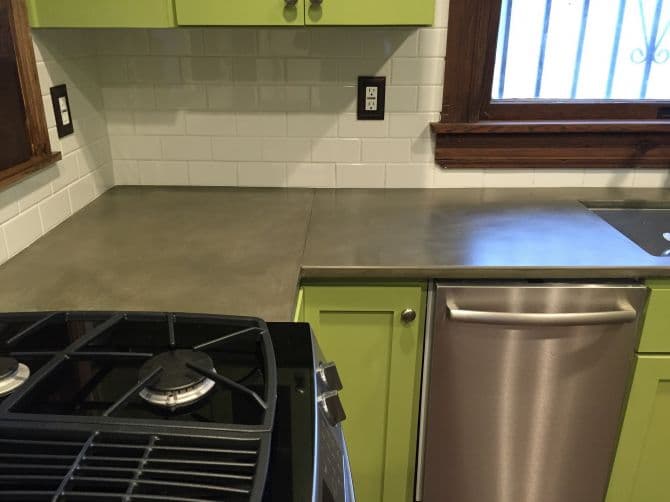
Photo: componentgeek
Concrete is more porous than granite, so it needs to be sealed every three months with a water-based sealant. However, some sealants, such as SIKA, which has a 25-year warranty, have a guaranteed long-lasting shine. If stained, you can sand down your countertop and repeat the sealing process again. The glossier the finish, the more resistant the sealant. Beware of oils and greasy foods. To clean concrete countertops, use any commercially-sold, non-abrasive product, though a sponge will work just fine.
The polish and sealant applied will give the surface a smooth-looking, non-porous, and stain-resistant aspect. In terms of hygiene, done are bacteria-incrusted ceramic grout joints. Although this material’s subject to cracking, its hard surface can increase the chances of broken kitchenware. To avoid damaging your knives and scratching the countertop, use a cutting board when slicing food.
Pieces of wood can be embedded into the concrete to create a sort of integrated drainboard or cutting board.
Steps to Pouring a Concrete Countertop
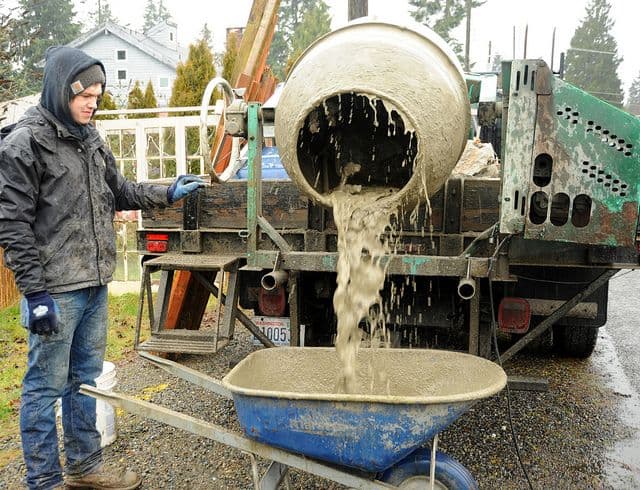
Photo: Wonderlane
A concrete countertop can be poured on-site or precast off-site, but it’s best to pour it off-site for the following reasons: to avoid getting dirty, making a mess inside the kitchen, and having enough space when pouring the concrete to ensure that the finished surface is face-down in the mould. The smooth surface, both visible and useful, will shape itself, whereas if you make your formwork where the countertop will sit, you’ll need to further grind and sand the surface to render it smooth.
1) Build a mould
Cut melamine-coated particle boards into strips to build the edges of the mould, drill two countersunk pilot holes at both ends of the mould and assemble the strips to make a mould. Screw in one coarse wall panel fastener in each pilot hole and into the binding ends to affix the mould’s edges.
2) Screw in the fasteners
Set up a drill into an angle drill guide, and proceed to drill pilot holes for countersunk screws at intervals along the top of the mould and countersink the holes to ensure that the screw heads are slightly sunken into the surface.
3) Affix the formwork to the base
Place the formwork on the base; the melamine side facing upward. Using a carpenter’s square, make sure that the edges are straight. Screw in one countersunk fastener on each side of the formwork, near the midpoint. The screw heads should be slightly lower than the formwork’s edges. Check again to make sure everything is straight, and continue to screw in the fasteners at intervals in the pilot holes. Frequently check to make sure that the fasteners are straight given that the pressure can easily create a gap between the formwork and the edges.
4) Make a hole for the sink (if necessary)
Need a hole for the sink? Using a circular table saw, cut three pieces of MDF panels the same size, then round out the corners as needed and sand them down. Fit the block (hole) into the mould.
5) Finish pouring the concrete
Seal all sides of the mould with polyurethane varnish and caulk the mould with silicone once the varnish is dry.
Add rebar to reinforce the structure. The rebar should extend the mould’s entire perimeter and must be at least 2.54cm away from all sides and the top surface.
Add tie wires around the rebar loops and allow for at least a 1.27 cm gap on top of the concrete. Screw in a few fasteners on the outside of the mould near the top surface and use tie wires to secure the rebar. Once the tie wires are in place, remove the temporary spacers. Make sure the whole is sturdy by adding reinforcement material, such as chicken rolled fencing over the rebar and tying it together.
Make sure that the table on which the mould is placed is sturdy. Add the dry ingredients to a concrete mixer. In a bucket, mix the wet ingredients. While the mixer is turned on, slowly add the wet ingredients to the dry ingredients.
Fill in the mould with the concrete mixture all the way into the corners. Vibrate the mould to ensure that the concrete settles in all the crevices using a rubber mallet or bounce the table off the floor with the help of someone else.
Remove the excess concrete from the mould using a 2 x 4 and slide it over the mould in a back-and-forth motion.
Cut the tie wires holding the rebar loops and push the end of the cut rebar wires under the concrete’s surface.
Smooth out the concrete’s surface using a metal levelling tool like an angle bar or a square metal tube. Work slowly by means of back-and-forth motions and allowing excess water to fill in the extrusion. Since this surface will be the countertop’s underside, no other tool is needed. Cover the concrete with a plastic sheet and allow it to dry and cure without touching it for a week.
Remove the plastic covering and then break up the mould and remove it, without pushing against the freshly poured concrete.
With the help of a friend, turn it over and remove the concrete countertop from the mould.
Clean and seal the concrete countertop.
Make sure that the base cabinets onto which you’re placing the concrete countertop are reinforced and that the plumbing is already installed. Apply a thick layer of silicone-based panel adhesive on top of the cabinets. Then, with the help of someone else, place the concrete countertop atop it. Allow the glue to dry overnight before connecting the sink.
Optional Steps
If you’re making a hole for the sink, you’ll need to cut the slab in any case. Cut out the piece into multiple sections until you’ve completely removed it, doing so carefully as the concrete edges are fragile.
Are you looking to create an extra-polished surface similar to that of natural stone? Grind the surface using finer and finer diamond sanding pads. Then, regularly rinse the surface with clean water. Lastly, if you’ve made a hole, install the sink.
How to Coat a Countertop with Concrete
Pouring a concrete countertop renders an element massive, raw even, but there’s a less challenging alternative: coat your countertop in concrete. Whether it be your kitchen or bathroom countertop, you only need three days to give it a concrete-like appearance. Here are the steps to follow:
Day 1: Clean the countertop and apply two coats of SuperBond adhesive, a primer that’ll provide a permanent adhesion.
Day 2: Mix and apply three coats of Color Mix solution (the pre-coloured solution and packets of factory-prepared, pre-mixed cement make the task easier).
Day 3: Apply one coat of ColorLock sealant to enhance the colour and prevent discolouration. Apply a finishing coat of ProGuard to prevent scratches, stains, and water rings.
By choosing a concrete covering, the finish is both smooth and slightly textured, and you can choose between the following colours: slate, concrete, river rock, onyx, espresso, champagne, and cocoa bean. The covering is really durable, more so than paint, and it resists especially well to impacts and heat.
Want to learn more about concrete counters? Check out our article Are Concrete Countertops Right for Your Kitchen?
What Are the Possible Aesthetics?
Concrete furniture is usually quite sleek, but artisans can make a countertop at an angle or with rounded edges, with a hole for the sink or just a single slab. The backsplash can be a part of the same slab, which gives the concrete a severe right angle. Sizes (thickness) vary as well. There are a lot of colours available; up to 40 different hues are available to be used for certain concrete, and you can also add a shell-like shine to create a pearlescent or crushed glass finish. The polish and sealant applied will give the surface a smooth and non-porous aspect.
Photo: DEX_Industries
On top of choosing the material, you can choose the mould in which it’ll be made, so you can cherry-pick the shape of your counter’s edges: double fancy radius, half bullnose, o’gee, fancy, square edge, bendable square, slate, and stone.
Depending on the application, you can mimic the smooth finishes of marble and granite, or simply create a concrete finish that’s more or less coarse. For a smooth finish, move the trowel up and down the concrete, firmly and evenly pressing down over both coats. For a cast concrete look, a uniform look isn’t required.
Are you looking for an expert to install your concrete countertop?
Fill in this form to be connected with top-rated contractors!
Are Concrete Counters Eco-Friendly?
According to EcoHome, whether concrete is poured, cast, or composite, it’s versatile and doesn’t emit volatile organic compounds (VOCs), while also being extremely resistant and durable. You can easily purchase local, wholesome, and reclaimed concrete. However, as a downside, concrete materials need to be sealed regularly, have elevated gray energy, and have a hard surface that can stain or crack.
Furthermore, concrete produces dust at all times, therefore the surface has to be protected with a water-based, non-toxic sealer. Said product costs between $72 to $240 per square foot, the application included. Note that polished concrete is more expensive than smooth concrete, expect to pay about $11 per square foot for a polished countertop.
Opt for green or ternary blended concrete in which post-industrial waste replaces about 30% of the cement. Thereby, clinker, a compound found in the making of cement, is replaced by industrial by-products. This alternate method renders the cement manufacturing process less harmful to the environment.
Energy and resource consumption, CO2 emissions, and adverse environmental impacts are reduced by this concrete manufacturing process. It’s the making of “recycled concrete.”
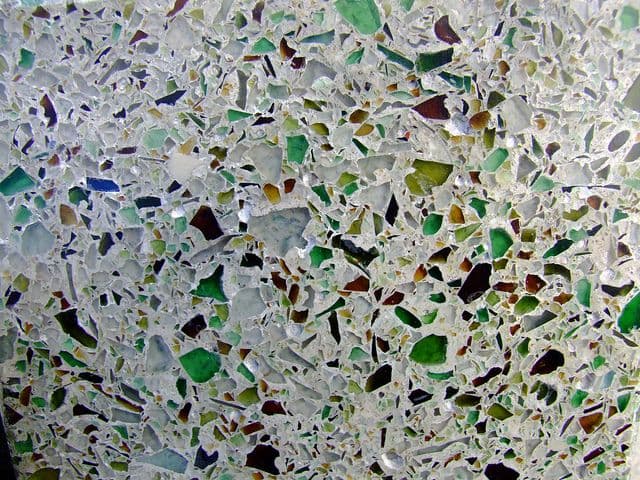
Photo: nz_willowherb
As for sealants, those that seep into the concrete are much more durable than those that simply coat the surface, and that can also scratch it. Epoxy sealants are efficient, but emit a reasonable amount of VOCs, which means that once applied on the countertop, the home must be aired out for a couple of days. Professionals recommend comparing sealants based on their VOC content and low-concentration sealants.
Choosing concrete makes it an eco-friendly choice for the following reasons:
Durable, eco-friendly, aesthetic, and low-cost finish;
Very durable and low-maintenance surface;
Old concrete can be polished;
Doesn’t require additional coverage on the slab itself;
Can be used as a thermal mass;
Enhances reflectivity by allowing more natural light to seep in.
Are you looking for information on how to repair a concrete countertop? Check out our article How to Repair Cracks in Your Concrete Countertop.
Are you looking for more information about materials, maintenance, and the different types of countertop renovations? Check out our Countertop Renovation Guide.
Get 3 quotes for your concrete countertop project
RenoQuotes.com can help you find a trustworthy contractor for your concrete countertop renovation project. By submitting your project to us, we’ll be able to put you in contact with the best companies in our network. Fill in the form on the homepage (it only takes a few minutes).
Dial 1-844 828-1588 to speak with one of our customer service representatives.
Last modified 2023-11-07
Looking for something else?
Related articles
The latest industry news, interviews, technologies, and resources.

RenoQuotes.com • 15 Nov 2023
The bedroom, a peaceful, rest and relaxation haven, is, for all intents and purposes, an area that’s particularly cherished. And, the feature that obviously conjures relaxation the most is, without a doubt the bed, which one slumps onto after a workday.

Cynthia Pigeon • 07 Nov 2023
Quebec’s weather can really put a damper on the integrity of homes, and at times, it may appear as though the walls of your home are “sweating”. However, this phenomenon can also be indicative of a larger problem.

RenoQuotes.com • 07 Nov 2023
It’s not much of a secret that the construction industry is facing a labour shortage, as many companies report a lack of labour although faced with growing demands. With the industry itself booming in sectors such as residential housing, commercial properties, and public work projects, the workforce necessary to take on these projects isn’t readily available. So, what effect will the labour shortage have?

RenoQuotes.com • 07 Nov 2023
In Canada, many buildings are equipped with metal roofing. From the opulent Chateau Frontenac in Quebec City to the humble homes of a residential neighbourhood in Edmonton, this type of roofing has proven that it can stand the test of time (it lasts an average of 50 years). However, from time to time metal roofing needs to be pampered and repaired.

Amanda Harvey • 07 Nov 2023
Regardless if you’re a renovation novice or an expert, a contractor even, the world of building permit requests is tricky to navigate. Of course, if you’ve taken on a renovation project or two, then you’re most likely aware of everything that's of importance, like applying for permits in the first place. In 1976, Ontario established the Building Code Act, to regulate and increase renovation quality control while offering homeowners protection. Therefore, if you’re renovating a structure in the City of Ottawa, you have to determine whether or not a work permit is required.