Are you looking for a contractor?
Submit our quick form and get quotes now!
Table of Contents
8 min read
Patio Pavers: How to Choose the Right Ones


8 min read
Patio Pavers: How to Choose the Right Ones
Exterior renovationsPatio Pavers: How to Choose the Right Ones
Building a patio is a great way to elevate your outdoor space, designing the ideal area to lounge, entertain guests, or simply enjoy the outdoors. Choosing your patio pavers isn’t just a stepping stone, but the initial step, impacting not only your patio’s aesthetics, but also its long-term durability and maintenance. Whether you’re looking for something natural, modern, or unique, this article will guide you through the essential criteria to consider when selecting the perfect pavers for your patio space.
The Different Types of Patio Pavers
Source: Canva
Concrete Patio Stones
This is the most common type of patio stone. A 12-inch by 12-inch white concrete square that perfectly mimics stone, to the point of closely resembling a slab. Concrete is extremely versatile, making it entirely feasible to design a circle-like pattern.
Patio Pavers
Whether made of stone or concrete, patio pavers can be:
Square
Rectangular
Brick-like
Pigmented (grey, ochre, beige, brick)
Just like all pavers, they can be used to design stunning geometric patterns when laid by landscaping experts. For example, they can be used to create a 9-foot, 5-inch circle or a two-circle configuration measuring 6 feet and 5 inches.
Round Pavers for a One-of-a-Kind Design
Round pavers are perfect for designing a standard, paver-made circle centrepiece, but with a rounded edge; they make for perfect circular shapes.
Another way to use round pavers is to purchase several pavers with differing diameters, installing them one against the other, the smallest to the largest. Using this design method, you can add a bit of a vertical-like feature to your patio’s surface, adding the statue or flower pot to this design set-up.
Natural Stone Pavers or Outdoor Tiles
Natural stone pavers are typically composed of one of the following three materials:
Granite
Slate
Lava stone
Since the above-listed stones are natural, stone patio pavers have different colours, perfectly mirroring the landscapes from which they originate. They also don’t require much maintenance or upkeep (a bit of warm water and soap) and are very hard-wearing.
Outdoor tiles are composite patio pavers (wood and recycled plastic), with a wood-like appearance. They’re manufactured in such a way that even their texture mimics the characteristics of wood.
Here are the primary advantages of such outdoor tiling:
Weatherproof
UV-resistant (non-fading colour)
Harder-wearing than wood
Using recycled plastic makes outdoor tiling an eco-friendly adjacent material.
In retail stores, they’re marketed as deck or balcony tiles.
Stones vs. Pavers
The reality is that to cover an outdoor space, the choice is entirely yours. In fact, the primary difference between stones and pavers is material thickness. In other words, pavers are thicker and are recommended for high foot traffic or vehicular areas. On the other hand, stones aren’t made to withstand regular dead loads, let alone one that’s distributed across four tires.
Choosing Stones Based on Patio Size
Source: Canva
12x12 Stones: Ideal for Smaller Areas
As we previously mentioned, this is the standard size of commonly used concrete patio stones. They’re perfect if your patio surface area is on the smaller side.
16x16 Stones: A Versatile Choice
16-in by 16-in stones are an interesting compromise between small and large-sized patio spaces. Such patio stones allow one to limit the number of tiles used and, therefore overall costs too.
These are just as aesthetically pleasing as 12-inch by 12-inch stones, yet all things considered, they’re a much more cost-effective choice.
24x30 Stones: For Large Patios
These big paver stones can only be laid for the makings of a large-sized patio space, unless you’re willing to set aside the idea of having an aesthetically pleasing shape. When used to cover large spaces, it definitely gives the patio a visually appealing look, appearing bigger than it actually is, with a charming look that can’t be achieved using smaller tile formats.
How to Install and Cut Patio Stones: Guidelines
Source: Canva
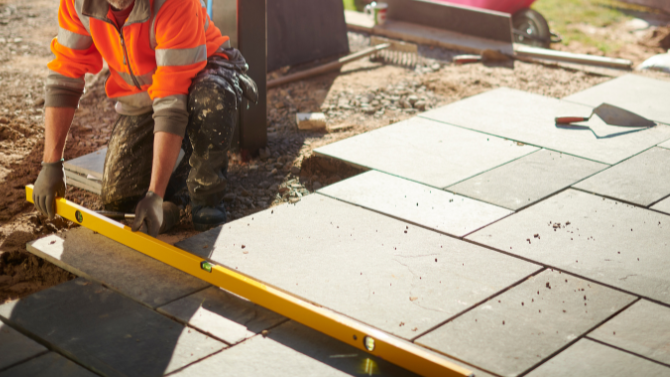
10 Patio Stone Installation Steps
Step 1: Inspect the ground
The soil type on which you’ll lay your stones or pavers will directly affect the type of foundation you’ll need to have. In Quebec, most properties are built on clay soils. Follow along our detailed guidelines to learn which foundation is best suited for your project.
Step 2: Outline the surface
With the help of stakes and a mason line, outline the area you’ll dig out to make your foundation.
Step 3: Excavate foundation
In areas where clay soils are found, the ideal foundation size for patio stones is at least 12 inches. Digging that deep will allow you to add must-have elements to ensure your stones or pavers hold up over time.
Step 4: Compact the soil
Once you’ve dug out the foundation, you can compact the soil using just about any compacting tool at your disposition:
Manual compactor
Drum roller
Plate compactor
Among others
To ensure your foundation is as strong as can be, remove any rocks, roots, or other obstacles found in the dugout.
Step 5: Drainage
Drainage might be the most important step to ensure your patio pavers or stones stand the test of time. To do so, your stones or pavers must be laid along a 2-5% slope.
At the same time, at the bottom of your dugout, add a geotextile or landscape fabric to protect your stones or pavers from rising water during heavy rainfalls.
Step 6: Add crushed stones
Over a roughly 4-inch thick surface area, add layers of 0/3/4 crushed stone, compacting the material between each new layer.
Step 7: Sand bed
Whether it be sand or stone dust, add a layer of granular material. Once this step is completed, check the surface to ensure it still has a 2-5% slope.
Step 8: Avoid treading on the surface
If you walk on the surface just made before laying the patio stones, you risk disrupting the sand bed, resulting in granular shifts. Then, when it comes time to lay the stones, the surface will have been pushed in, which will negatively affect your patio stones over time.
Step 9: Follow the installation design plan
This is where a DIY patio stone installation will differ from one done by a professional. If you’re not looking to create a specific geometric pattern, laying the stones will be a relatively easy feat.
However, if you want to create shapes to add an aesthetic appeal to your patio, not only will you have to follow along a meticulously designed plan, but you’ll also most likely need to hire a professional at some point.
Step 10: Fill in the joints
Last, but not least, fill in the gaps between every stone with polymeric sand. To ensure everything stays in place from that point on, run a vibrating plate over your patio stones. Doing so will allow you to spot any gaps that further need to be filled with polymeric sand.
Compact the surface once again, then allow your new patio surface to set over a 24-hour period.
How to Cut Patio Stones
We already delved into great detail about the different patio stone sizes. To create the most stunning outdoor surface area, the best way to do so is by alternating patio stone sizes. However, we’re not talking about a random design here.
You’ll need to pick a pattern, create a precise stone layout plan, then lay them accordingly, without deviating from your original plan. Once you’re nearing the edges of the surface, cut your stones accordingly.
The cut can be made with a:
Wet-saw
Standard saw
It the event of performing a dry-cut, you can use an angle grinder. Here’s its main advantages:
You probably already own one
Discs are easy to install
But also has a couple of downsides:
Dusty
Limited material thickness depending on the angle grinder
Wet cutting can be done with a much bigger grinder. It allows for the following:
Carry out large-scale projects
Efficiently cut numerous patio stones
Has a fixed cutting guide
The process isn’t as dusty (water-cooled)
Suits 15-inch (400 mm) diameter grinding discs
However, wet cutting also has a couple of drawbacks:
Heavy tool
Not as easily portable
Maintenance: How to Clean Patio Stones
Source: Canva
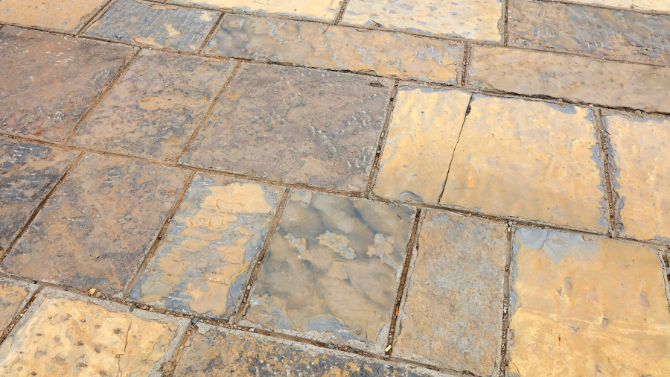
Water and a heavy-duty deck brush are your best bets. Forget about a pressure washer, it’s likely to create micro-fissures in your patio stones.
To prevent time-consuming and arduous cleanings, check your surroundings after every meal to ensure there aren’t any spilled foods or oil stains on the surface. If so, grab a paper towel or dry rag and clean the surface.
If you aren’t sure which products to use, note that dishwashing soap should get the job done. Otherwise, refer to the manufacturer’s maintenance instructions to select a product that was specifically designed for your stones or pavers.
Paving the Way to a Dream Patio: Picking Out the Best Stones
Choosing the best pavers or stones for your patio is a critical step that combines aesthetics, functionality, and durability. There are different factors to consider before making your final decision, such as:
Material
Colour
Texture
Weatherproof and hard-wearing
Opt for pavers or stones that blend with your home’s architectural style, while also meeting your use-related needs, ensuring your outdoor space isn't only elevating the look of your property, but also serving as a lounge and entertainment-prone area for years to come.
Get 3 quotes for your deck or patio building project
RenoQuotes.com can help you get quotes for your deck and balcony project. By submitting your project, we’ll put you in contact with top-rated contractors. Fill in the form on the homepage (it only takes a few minutes), and you will get estimates from trusted professionals.
Dial 1-844 828-1588 to speak with one of our customer service representatives.
Last modified 2024-02-09
Looking for something else?
Related articles
The latest industry news, interviews, technologies, and resources.
RenoQuotes.com • 26 Mar 2024
Are you looking to increase the space available in your yard, or simply for health and safety reasons, need to remove a tree? Note that once said tree is cut down, its stump will remain rooted, and you should really consider having it removed.

RenoQuotes.com • 07 Nov 2023
In Canada, many buildings are equipped with metal roofing. From the opulent Chateau Frontenac in Quebec City to the humble homes of a residential neighbourhood in Edmonton, this type of roofing has proven that it can stand the test of time (it lasts an average of 50 years). However, from time to time metal roofing needs to be pampered and repaired.
Cynthia Pigeon • 07 Nov 2023
For some people, the prospect of living in a house that is a genuine time capsule is something of a reality. Perhaps you’re one of the many who’ve decided to keep the original retro design going since you’re drawn to its history. However, after a while, your home may need a little tweak here and there.

RenoQuotes.com • 07 Nov 2023
Are your bedroom dimensions rather small? Although this situation requires us to show ingenuity and creativity, the fact remains that it’s possible to make even the smallest space both relaxing and grandiose.

N/A • 07 Nov 2023
When it comes to the ins and outs of owning a home, the roof may be last on the list of things we put time and attention into. Of course, the roof is a fundamental aspect of any well-maintained home, and its longevity will greatly affect the life of your house overall. Ventilation is a key part of maintaining a roof, so if you hadn’t considered roof vents before this moment, now is as good a time as any.