Are you looking for a contractor?
Submit our quick form and get quotes now!
Table of Contents
4 min read
How to repair caulking around your bath
4 min read
How to repair caulking around your bath
BathroomHow to repair caulking around your bath
Ageing caulk is unsightly, it turns brown and brittle, cracking around the edges. Once cracking of caulk happens, there is the potential for water to seep in, causing wallboard and surrounding framing to turn mushy, and further leading colonies of mildew to grow as well as mould. If you’ve noticed the signs of deteriorating caulking, then it is important to repair the material around your tub as soon as possible.
Repairing the caulk around your tub is an easy DIY job that even the most novice of homeowners can take on. Caulk is cheap and the application process is straightforward. Homeowners will need a few hours and tools and materials that can be found at the local hardware store. Follow our steps and your bathtub will be ready to use in no time!
How to caulk around a bathtub!
Know your caulk
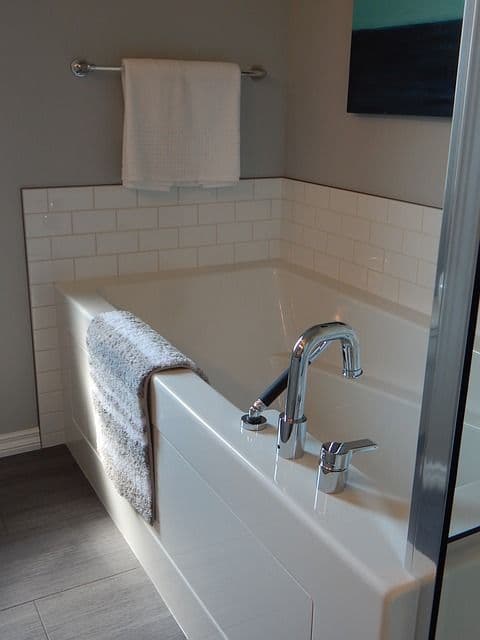
Source: Pixabay, ErikaWittlieb
Firstly, it’s important to choose the right caulk for your bathroom. Caulk that should be used around the tub will be labelled for “Kitchen and Bath,” as this type of caulk contains latex or silicone compounds that have been chemically engineered to resist mildew while sticking on to nonporous surfaces. However, the two main types of bathroom caulking, silicone and acrylic latex, work differently and it is important for homeowners to know their differences.
Silicone caulk is very strong while also being waterproof and flexible. However, this caulk is quite particular regarding surface conditions, and can also be difficult to smooth. Further, it requires mineral spirits to clean and emits a terrible odour until it has been cured. Silicone caulk is limited in colour to white, beige and clear.
Acrylic latex caulk is much more forgiving about the surface to which it is applied. It is easy to apply, as smoothing it out is simple and it does not emit a smell. Unfortunately, acrylic caulk is not as resilient as silicone and will need to be replaced sooner than the former. This type of caulking comes in an assortment of colours and is, therefore, more accommodating in modern homes.
Remove Existing Caulk around the bathtub
Slice away the old caulking with quick and sharp strokes; this can be completed using a painter’s tool and a razor scraper, or a utility knife. Bear in mind that working with metal blades can damage your tub if it is made of plastic. If this happens to be the case, use a plastic blade instead. Caulk removers also harm plastic, so make sure to be aware if using them around your surfaces.
Next, you’ll want to scrub the surface to prepare for the application of the new caulk, ridding of any trace of existing caulk residue. Use a non-abrasive pad or soft to remove traces of caulk residue. Following this, use a wet cloth to remove the dust that would have collected during the removal of the caulk. Next, dry the area using a dry cloth or hair dryer.
Tape and Caulk
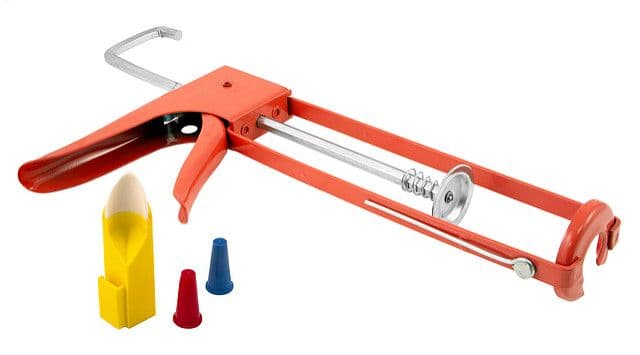
source: Flickr, Carlisle Hvac
Start the re-caulking process by laying two parallel strips of blue painter’s tape. The purpose of this is to keep the caulk away from and off surfaces it shouldn’t touch, as well as keeping the job straight and uniform. Point the hole of the nozzle towards the joint, keeping it 45 degrees out on either side. Next, apply steady pressure to the trigger as you move the gun along the length of the seam.
Make sure the caulking gun is moving at a steady pace, watching how the caulk is flowing from the nozzle. If you are moving too fast you will notice that the bead will be too thin, along with bubbles or breaks in the seal. If you are moving too slow, you will waste caulk and spend more time cleaning up then you will in the application process.
Smooth Surfaces
Once you have finished filling the seams, take a damp cloth and press it into the joint with a finger. Pull your finger along the joint in a continuous motion, as this will work to shape the fresh caulk into a concave space. Next, remove the strips of tape, making sure to avoid touching the freshly laid caulk. Once the tape is removed, smooth out the surface again to eliminate any tiny ridges that have been left by the tape. Wait at least 24 hours for the caulk to cure before your tub or shower.
Get 3 renovation quotes for your bathtub caulking project
RenoQuotes.com can help you get quotes for your bathtub caulking project. If you submit your project to us, we’ll put you in contact with top-rated contractors. Fill in the form on the homepage (it only takes a few minutes), and you will get estimates from trusted professionals.
Last modified 2023-11-07
Looking for something else?
Related articles
The latest industry news, interviews, technologies, and resources.
RenoQuotes.com • 07 Nov 2023
Suffice it to say, a sweating toilet tank is never welcomed. Between puddles of pooling water on the floor, to the unpleasant feeling of condensation in the air, mould growth, and a malodorous smell, using the restroom can quickly turn into something quite dreadful. Is your toilet tank humid without fail and you’re unsure how to fix this problem? A toilet tank anti-condensation liner kit will solve the issue in no time! Check out the following to learn more about it.

N/A • 07 Nov 2023
Bathroom renovations are always an excellent investment, as they tend to offer the best return. Not to mention, the bathroom is a fairly integral room in the home. This space is used on a daily basis for many essential activities, and this includes washing up in the morning as well as before bed, getting ready for work, taking care of overall hygiene and so forth. Even though it’s a small space, storage is essential.

N/A • 07 Nov 2023
A catalyst of post-war and industry, modern home decor is a bridge between the new and the old, the functional and the present. Modern decor incorporates minimal aesthetic choices regarding the colour scheme, pattern, architecture and furniture, with bold pops of colour hidden in this otherwise unfussy and sleek style.
RenoQuotes.com • 07 Nov 2023
Energy efficiency in a home is a key issue, especially during the winter months, and even more so if it is an older structure. Having effective insulation is frequently listed as the first step to reducing heating costs.

Cynthia Pigeon • 07 Nov 2023
One can easily think that residential roofs only need to remain leak-proof to be immune to the elements and guarantee the best home protection.