Are you looking for a contractor?
Submit our quick form and get quotes now!
Table of Contents
4 min read
How to Replace Kitchen Floor Tiles
4 min read
How to Replace Kitchen Floor Tiles
KitchenHow to Replace Kitchen Floor Tiles
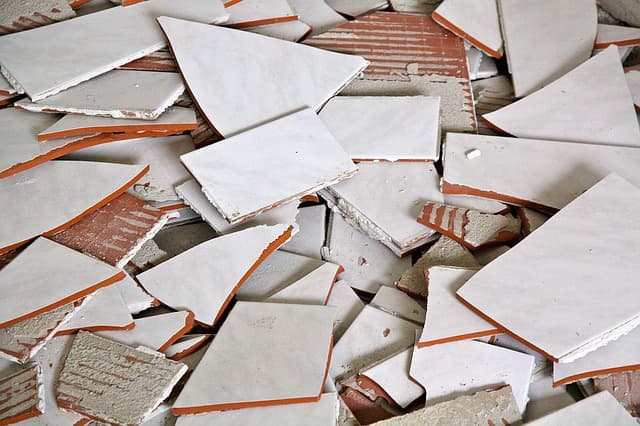
Kitchen floors covered in ceramic tiles are a durable and low-maintenance option for any home. However durable, one slip of a hot pot could easily cause a crack in the tiles, leaving you with a partially broken floor. Luckily, this is an easy fix that can be done without destroying the entire floor.
Most homeowners can handle this DIY project, but it's important to be precise when replacing a tile and not get too “hammer-happy.” Following our step-by-step guide, anyone can quickly and comfortably replace a tile!

Here are simple steps to replace broken kitchen floor tiles:
Remove the grout
Grout is a fluid concrete that is used to fill in the gaps and seal joints around your tiles. In order to replace those broken tiles, the first step is to remove the existing grout that is holding them in place. To begin this process, make sure that you are wearing the correct safety glasses to protect your eyes from chips and dust that will arise during the removal process.
Rake out the grout around your broken tiles using a carbide-tipped scoring tool or a grout raker; both these items can be found at your local hardware store. Be extra cautious and make certain that a proper amount of pressure is applied when removing the grout. Applying too much pressure can lead to slipping or gouging surrounding tiles, and the point of this project is to fix things, not to make them worse!
Lift the broken tile
Now that all of the grout has been removed, you can loosen the broken tiles from their place. It is important to first protect the tiles surrounding the broken ones. This can be done by applying painter's tape around the edges of the adjacent tiles, making sure the pieces of tape overlap slightly for ultimate protection. Once the intact tiles are safe and sound, drill holes into the broken tile sections with a ¼-inch ceramic bit. This helps to break up the tile, allowing the pieces to be freed from the substrate, and thus, you can chisel them out.

Chisel away!
Using a hammer is a great form of stress relief, but this next step requires a little bit of finesse so don't go smashing that hammer into your floor just yet. Working from the centre and moving out toward the edges of the tiles, gently tap out broken pieces with your hammer and a narrow chisel. We are recommending the chisel be 3/8 or ¼ inch. If you don’t have a tile chisel in your home, a flat-blade or cold chisel can do the trick. Aim the chisel at a 90-degree angle to the floor, and penetrate the glaze.
Now, switch to a 45-degree angle to continue to chisel away allowing all pieces of the tile to become loose. Now, remove all pieces of the tile from the area. Once all tile is removed, use a wider chisel alongside the same removal technique in order to clean out the old substrate or hardened adhesive that will be revealed with the removal of the tile. This will leave a clean and smooth space for you to set the new tile neatly into.
Lay your new kitchen floor tiles

Now it’s time for the fun part, as you’ll set the new tiles in place. First, apply a small amount of thinset mortar or another tile adhesive over the substrate. This will need to be combed over using a 1/4-inch notched trowel. Add the thinset to the back of the new tile as well for the best adhesion possible. Set the tile in place by pressing firmly down, making sure it is levelled out with surrounding tiles. Adjust to make sure that spacing is even on all sides of the tile.
Fill in the mortar joints
Once the tiles are laid and the grout is drying, wait at least two hours to take on this last part of the process. After 2 hours, the thinset should be cured, and you can mix up some grout to seal in those beautiful new tiles. Swipe the grout at a 45-degree angle using a rubber grout float. This will take about 15 minutes to harden, and when the grout is no longer tacky to the touch, remove its excess with a damp sponge or cloth.
Try not to walk on the tiles for at least 24 hours, as you’ll want the grout to completely dry to be sure that the grout is set in place. Voilà! Your tiles have been replaced and no one will ever know about that initial crack!
Get 3 renovation quotes for your kitchen tiling project
RenoQuotes.com can help you get quotes for your kitchen flooring renovation project. If you submit your project to us, we’ll put you in contact with top-rated contractors. Fill in the form on the homepage (it only takes a few minutes), and you will get estimates from trusted professionals.
Dial 1-844 828-1588 to speak with one of our customer service representatives.
Last modified 2023-11-07
Looking for something else?
Related articles
The latest industry news, interviews, technologies, and resources.

Christime Simard • 07 Nov 2023
When renting an apartment, either with roommates or by yourself, the bedroom quickly becomes our safe space. Not only does it reflect our taste, but also our personality and interests. However, even if your decor is perfectly curated, you might still want a new look after a while.

Christime Simard • 07 Nov 2023
A veritable Alibaba cave for all the foodies and apprentice cooks of this world, the pantry should be as practical as it is aesthetic. Between simplicity and modernity, its layout deserves thought and organization to make your kitchen experience as pleasant as possible.

RenoQuotes.com • 07 Nov 2023
There’s nothing like a bit of paint to morph a room, to then embrace the environment in no time. While painting projects are mostly feasible by all, it still goes without saying that professionals have proficient knowledge of the basics of painting to carry out a flawless finish. If that doesn’t reflect your abilities, unsightly marks could give you away sooner or later...like paint blisters or bubbles appearing on a freshly coated wall.

Cynthia Pigeon • 07 Nov 2023
Did you know that windows and glass doors are majorly responsible for heat loss in homes? Therefore, energy efficiency is a determining factor when it comes to changing your windows to maximize energy savings.

RenoQuotes.com • 07 Nov 2023
Basements today have become very valuable spaces within the home. Whether it’s a recreational space to relax or has extra bedrooms or storage space, making the best use out of your basement is ideal. An added plus to remodelling your basement is that it’s a great return on your investment, with the average return being anywhere from 50 to 75 percent.