Are you looking for a contractor?
Submit our quick form and get quotes now!
Table of Contents
4 min read
How to Build a New Interior Wall
4 min read
How to Build a New Interior Wall
Interior renovationsHow to Build a New Interior Wall
If you’re living under a roof where privacy is a privilege, you might be thinking about how you can section off the rooms of your home to make them more intimate. Building a non-bearing interior wall can add an element of separation and independence to even the most open of spaces. This project requires basic carpentry skills, as well as tools to go along with them.
Building an interior wall will greatly depend on the existing structure, including the floors, walls, and ceiling. You may have to make a few minor adjustments to accommodate the new structure, but have no fear! If you’re interested in creating a new wall for whatever reason, read on to find our step by step guide for this project.
Here's how to build an interior wall!
1- Measure and mark
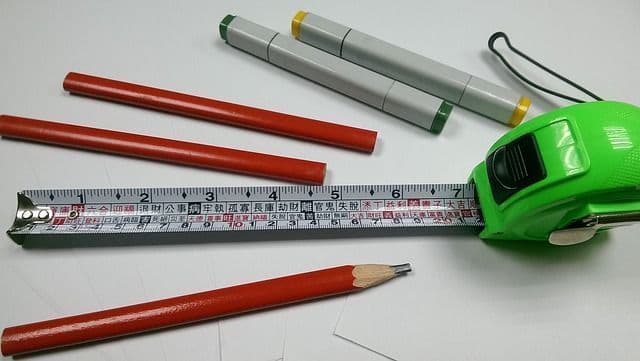
source: Pixabay, jin3068
First off, determine where you want the wall to go, looking at the existing structure. You’ll need to remove anything obstructing where your new wall will be placed, including plasterboard, as this will allow you to see ceiling joists and wall studs. If these are not visible, you will require a stud finder to locate the studs and joists.
Once this has been completed, mark the centre line of the new wall you are going to build, using chalk to draw a line across the ceiling. Next, you must measure half the width of the wall and mark this in either direction. Plan to insert a stud at each end to hold the wall in place.
Following this, measure the placement of each wall stud onto the wall plates, laying both top and bottom plates side-by-side on the floor. Make sure to measure as carefully as possible, marking perpendicular lines across the plates. Use a combination square so that the studs will align correctly.
2- Insert the ceiling plate
Make sure that before you begin working with tools that you wear protective eyewear, as well as ear protection if you’re working with loud machinery. Be certain to ask for help lifting items if necessary. If the joists have not yet been located in the ceiling, now is the time to do so. If your new wall is going to be perpendicular to the ceiling joists, plan to attach the wall where the joists intersect.
However, if the wall is parallel, you have more than one choice. One option is to locate your new wall directly underneath one of the joists, and the other is to install nailing blocks every 16-inches between the placement of the joists. These blocks will act as a border for your new wall to be nailed directly into.
Once you’ve decided on your method of operation, hold the top ceiling plate in position along the guideline that you’ve marked. Once in place, nail through and into the ceiling, or the nailing blocks if you’ve chosen this style. Use 3 ½ inch nails, and work to fasten the plate neatly in place.
3- Plumb bob and insert studs
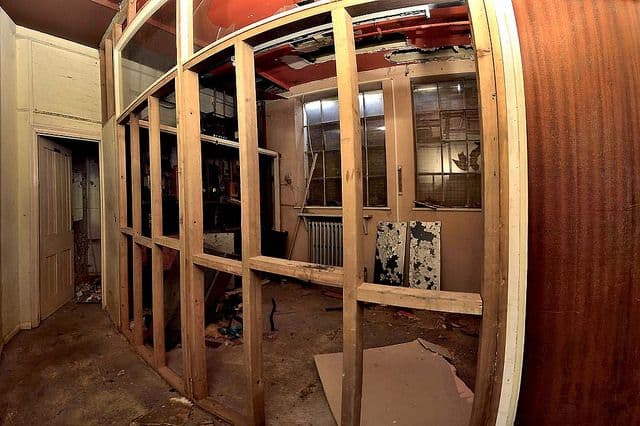
source: Flickr
Now that the ceiling plate has been inserted, hang a plumb bob from either end of the plate. A plumb bob is a string with a weight resting at the end. Following this, mark the floor directly below the bobs to know where the bottom plate will be located. Use chalk to draw a line along the floor between the marks. Now, nail the floor plate in place, staggering nails in the same fashion as the ceiling.
Next, measure the height of the room, and subtract the combined thickness of the two plates. This will help you to determine the length of your studs. Now, if studs have not been precut, cut and place the studs between the top and bottom plates, attaching them with nails or screws. You can do this by lifting the stud into position and lining it up on its mark, making sure it is flush with the edges of both plates. You can check the plumb using a carpenter’s level.
4- Form connections and insert the wall
Now, it’s time to lift the new wall into place. Line it up directly with the chalk line you made across the floor, but also make sure to line it up with the line on the ceiling. Again, use the level to make sure the wall is vertical. If gaps exist between the wall and ceiling, shim them. Nail or screw the wall into place in the ceiling joists. Further, if there is a wall on either side of the new wall, secure it in place there as well.
Steps to follow | What you need to do |
1) Measure and mark |
|
2) Insert the ceiling plate |
|
3) Use the plumb wire and place the studs |
|
4) Form contacts and insert the wall |
|
Here's some articles that might be interresting:
Get 3 renovation quotes for your interior wall project
RenoQuotes.com can help you get quotes for your interior wall project. If you submit your project to us, we’ll put you in contact with top-rated contractors. Fill in the form on the homepage (it only takes a few minutes), and you will get estimates from trusted professionals.
Dial 1-844 828-1588 to speak with one of our customer service representatives
Last modified 2023-11-07
Looking for something else?
Related articles
The latest industry news, interviews, technologies, and resources.

RenoQuotes.com • 07 Nov 2023
Good indoor air quality in your home is essential for living well, especially if your family members have allergies. This is even truer if your windows stay closed for most of the year.
N/A • 07 Nov 2023
Moving into the first month of the year, we’re looking at our interiors with a new and critical eye. As a result of the pandemic, many have had to restructure their lives to comply with restrictions, and are thus spending a significant amount of time in their interior spaces.
Cynthia Pigeon • 07 Nov 2023
Roofing underlayment isn’t a luxury. It’s the one element that guarantees a decent and weather-protected structural design.

RenoQuotes.com • 07 Nov 2023
Is your living room floor showing telltale signs of wear and tear? If it seems faded and scratched in several areas, then it’s about time to replace it. So, here are a few options available to you!
RenoQuotes.com • 07 Nov 2023
Canada's weather conditions make life particularly hard for homes. Fortunately for us, new buildings are much more efficient in terms of preventing air and water infiltrations from happening. However, old buildings may experience significant deterioration due to changes in temperature.